

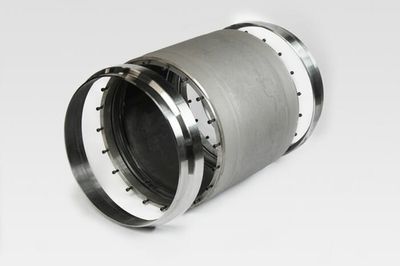
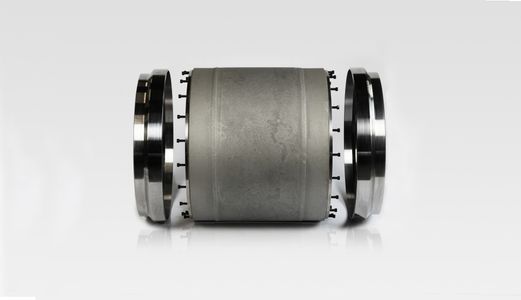
SCHUCK ‘SU’ SLEEVE CONNECTOR
On Site Installation
Schuck manufacture the "slide over connector" like no other company and delivers very small to very large units. Sometimes, however, a large SMU Connector is not sufficient, in which case the SU Connector is used. Thanks to an active sealing system, SU slip-ons from DN500 can be practically positioned on the pipes with little effort, and still seal securely.
We accompanied a construction project from morning to evening ...
A DAY ON THE CONSTRUCTION SITE WITH SCHUCK
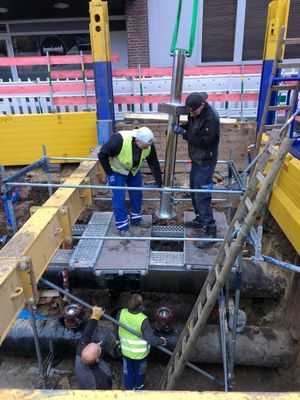
Arrival at the construction site
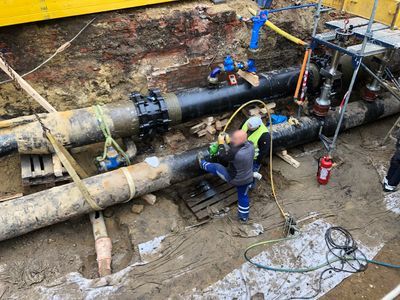
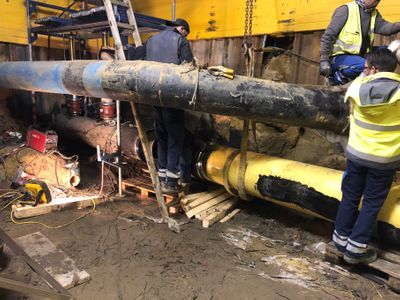
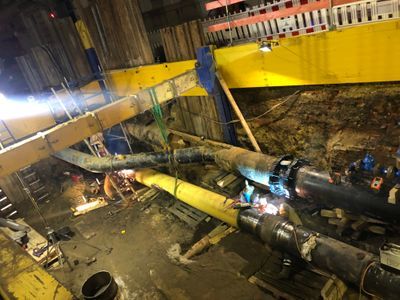
Part of a DN500 gas line is to be renewed on a busy street in the urban area. You can also see a measure on the parallel water pipe that has already been completed. The crossing water pipe makes accessibility difficult for work on the gas pipe. The generously excavated and exemplary secured work area still allows access for the necessary work.

Site location.
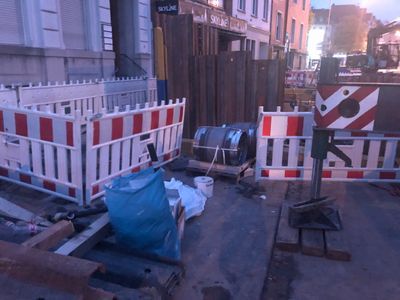
SU Connectors stand by.
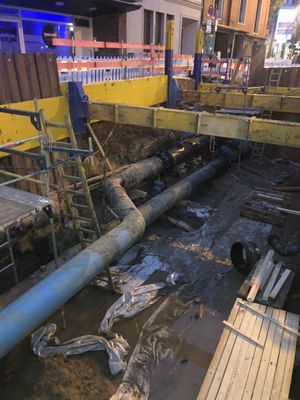
View into the excavation.
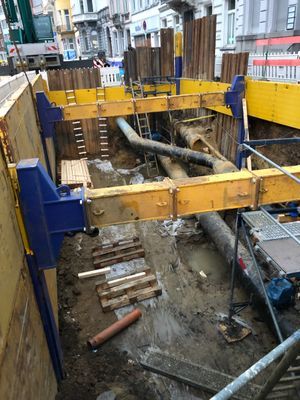
The exposed gas pipe, above it the crossing water pipe.
Preparation of the construction site
Before the actual work on the line can begin, the work area must be made free of pressure and gas. For this purpose, double barrier bladders are used, which are introduced into the pipe on each side by two bladder setting devices from Hütz & Baumgarten.
Establishing a pressure and gas-free work area.
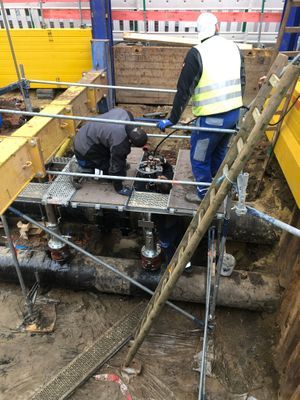
Installation of the barrier.
Start work on the gas pipe
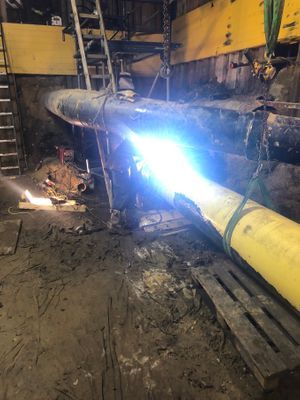
After the electrical jumper has been installed to avoid sparking when the line is disconnected, pneumatic saws are used to cut the line.
Attachment of a by-pass.
Then the work begins.
The gas line is cut using compressed air saws.
Replacement of the gas pipe section
The pipe section to be replaced and separated out is removed from the construction pit.
It is important to pay particular attention to the crossing water pipe so as not to damage it.

The "old pipe" attached to the crane.
Navigated with a sure instinct.
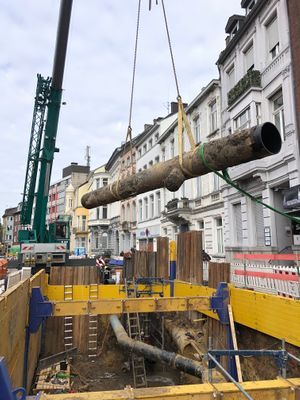
Pipe being lifted out of the excavation.
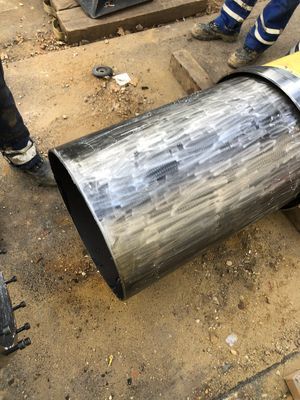
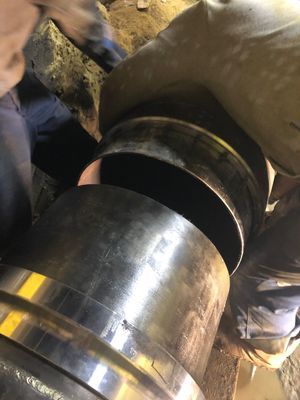
Preparation of the pipe ends
The pipe ends are stripped of the coating in the area where the sliders will later be installed. One side at least over the entire length of a slip and the other side at least over half the length of a slip. Due to the better accessibility, the new pipe section to be installed is often stripped to the greater length and the existing pipes in the trench shorter. In addition, the edges are provided with a bevel or a radius to make it easier to slide over and to prevent damage to the seal. This is especially true with the SMU and SMH slip-ons taking care to ensure easy assembly. Due to its special sealing system, the SU cover is somewhat more tolerant of small chamfers / radii, as the seal does not yet touch the pipe when it is pushed over.
Existing pipe stripped to half its length.
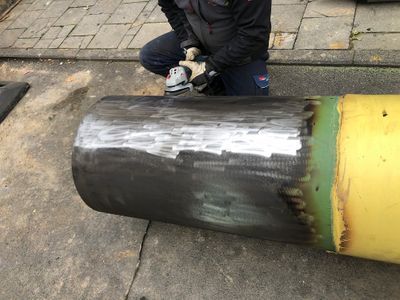
New pipe stripped over the full length.
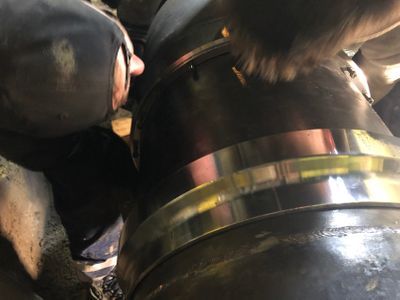
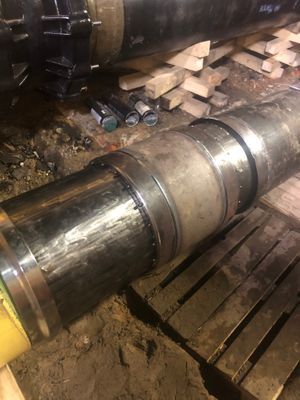
Assembly of the slipover
Generously greased, the SU sleeve can then be pushed completely onto the longer stripped pipe. It is important to pay close attention here because the weld-on ring must also be pushed onto the pipe in advance. If that is forgotten, lengthy reworking will be necessary.
Greased seal on the SU cover.
Greased new pipe.
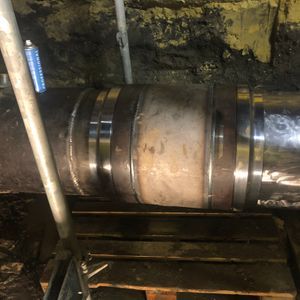
Completely slid-on SU with weld-on ring.
Welding the pipeline to the sleeve
The welding rings (on both sides) are required to weld the SU sleeve to the pipe.
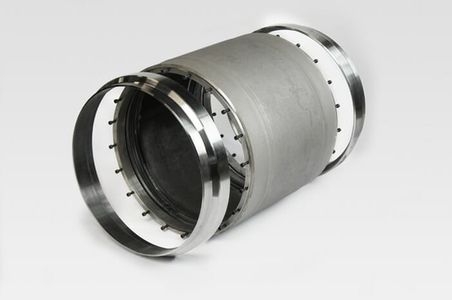
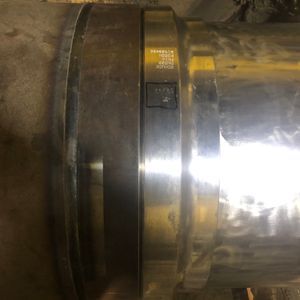
Schuck SU Sleeve.
View on the weld-on rings.
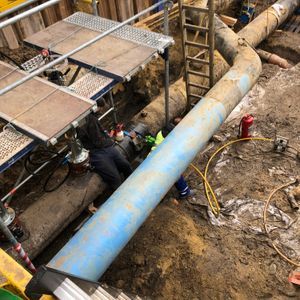
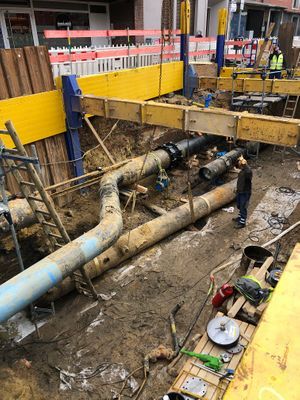
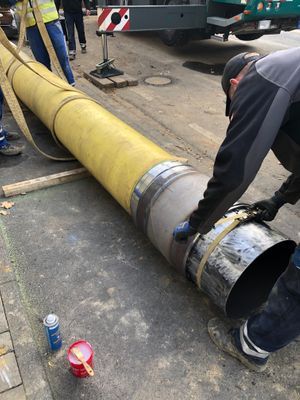
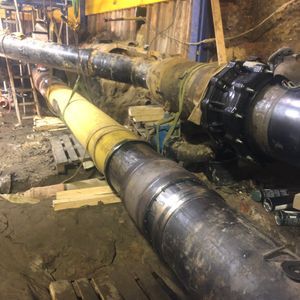
Insertion of the new pipeline
The prepared new pipe section is then lowered into the construction pit and aligned. It is important that the alignment with the existing pipes and the gap between the pipes fit.
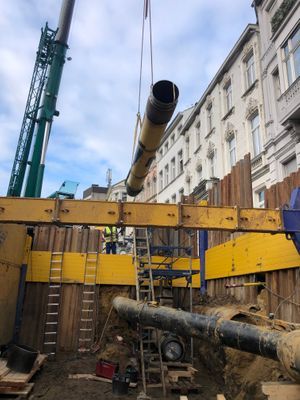
New pipe is lowered with the crane.

Easy to see: the SU slip-ons pre-assembled on both sides.
Positioning below the crossing water pipe.

Final preparations.
Adjusting to get the exact alignment.
Precise alignment of the gap between the pipes.
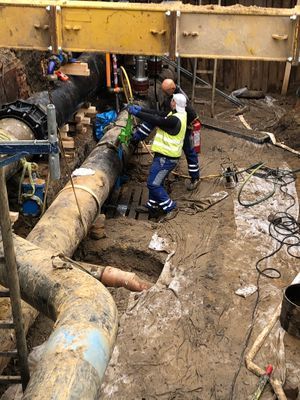
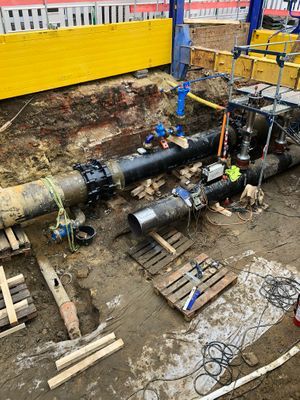
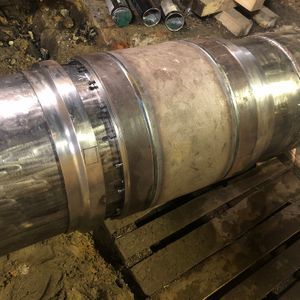
Installation of the sleeve in the pipeline
The connector is pushed over on the opposite side so that the gap between the pipes is in the middle of the connector. The seal is then "activated" by tightening the screws which tightens the seal onto the pipe.
Positioning the SU Sleeve.
Bracing of the seal.
Sealed SU Sleeve.
Sealed SU Sleeve underneath water pipe.
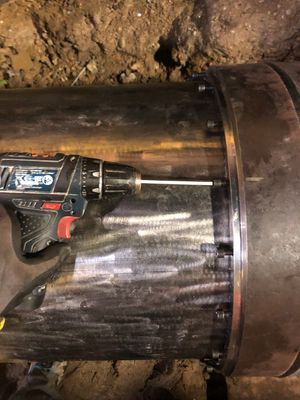
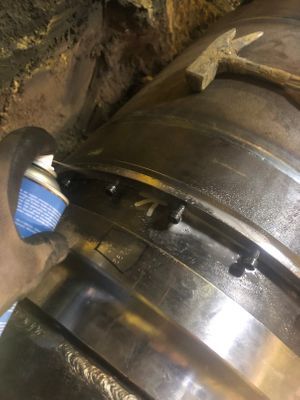
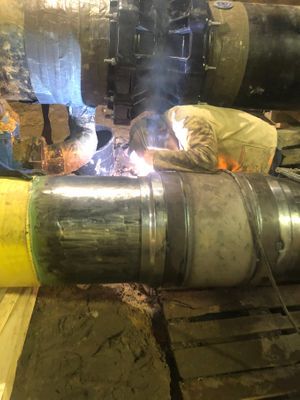
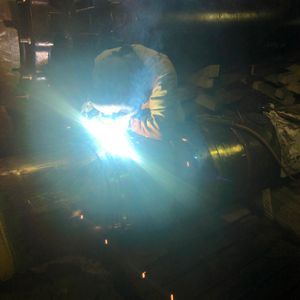
Welding and final assembly
Before welding can take place, the working area must be gassed and flushed. When the pressure builds up, the slip-ons must be monitored for impermissible movements and the temporary SU seal is checked for leaks. Then the welding rings are placed on the SU and welded.
Leak test with foaming spray.
Applying the welding rings.
Applied weld-on ring.
SU slip-ons prepared for welding
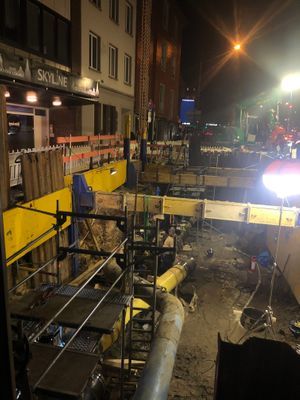
A long day on the construction site is coming to an end
While the SU Connectors are being welded to the lines with the weld-on rings, the line is already in operation again. Gas is already flowing again and the customers are safely supplied. After the welding seams have been checked, the work area is re-insulated, and the excavation can be closed again and the surface restored.

Thanks to reliable technology in the best quality, the safety of the gas line could be restored without endangering the fitters and with manageable effort.